Gluten Free Sourdough Bread Recipe: Best Method for Success
Imagine the rich, tangy aroma of freshly baked bread filling your kitchen. It’s a dream for those with gluten sensitivities. For years, I felt left out while my family enjoyed traditional sourdough.
That all changed when I found gluten free sourdough bread Recipe. It’s a game-changer for anyone missing homemade bread. It turns dietary restrictions into a delicious opportunity.
Baking gluten free sourdough bread is an adventure. It requires patience, precision, and a bit of kitchen science. I’ll guide you through every step, making the process easy to understand.
Table of Contents
Key Takeaways
- Gluten free sourdough bread is possible with the right techniques
- Wild yeast fermentation creates unique flavor profiles
- Special flour blends are crucial for texture and taste
- Homemade sourdough offers better nutrition and digestibility
- Patience is key in creating perfect gluten free sourdough
Understanding Gluten Free Sourdough Basics
Sourdough bread is a fascinating journey in the kitchen. It turns simple ingredients into a complex, tasty treat. For those new to gluten-free baking, learning about sourdough opens up a world of tasty options.

What Makes Sourdough Unique
Traditional bread and sourdough are worlds apart. Sourdough uses wild yeast and bacteria for fermentation. This creates a unique taste and texture.
This natural process has many benefits:
- It’s easier to digest than regular bread
- It has a complex, tangy flavor
- It’s great for making gluten-free bread crumbs
Benefits of Gluten Free Sourdough
Gluten-free sourdough has special nutritional perks. The fermentation breaks down tough proteins, making it easier to digest. You can also use your gluten-free bread crumbs in many recipes.
Wild Yeast Fermentation Science
The magic of sourdough comes from wild yeast fermentation. Natural microorganisms turn flour and water into a living ecosystem. This process adds depth to the flavor and boosts the bread’s nutritional value.
This makes gluten-free bread crumbs more than just a substitute. They become a gourmet ingredient.
Sourdough is more than bread—it’s a culinary art form that connects us to traditional baking methods.
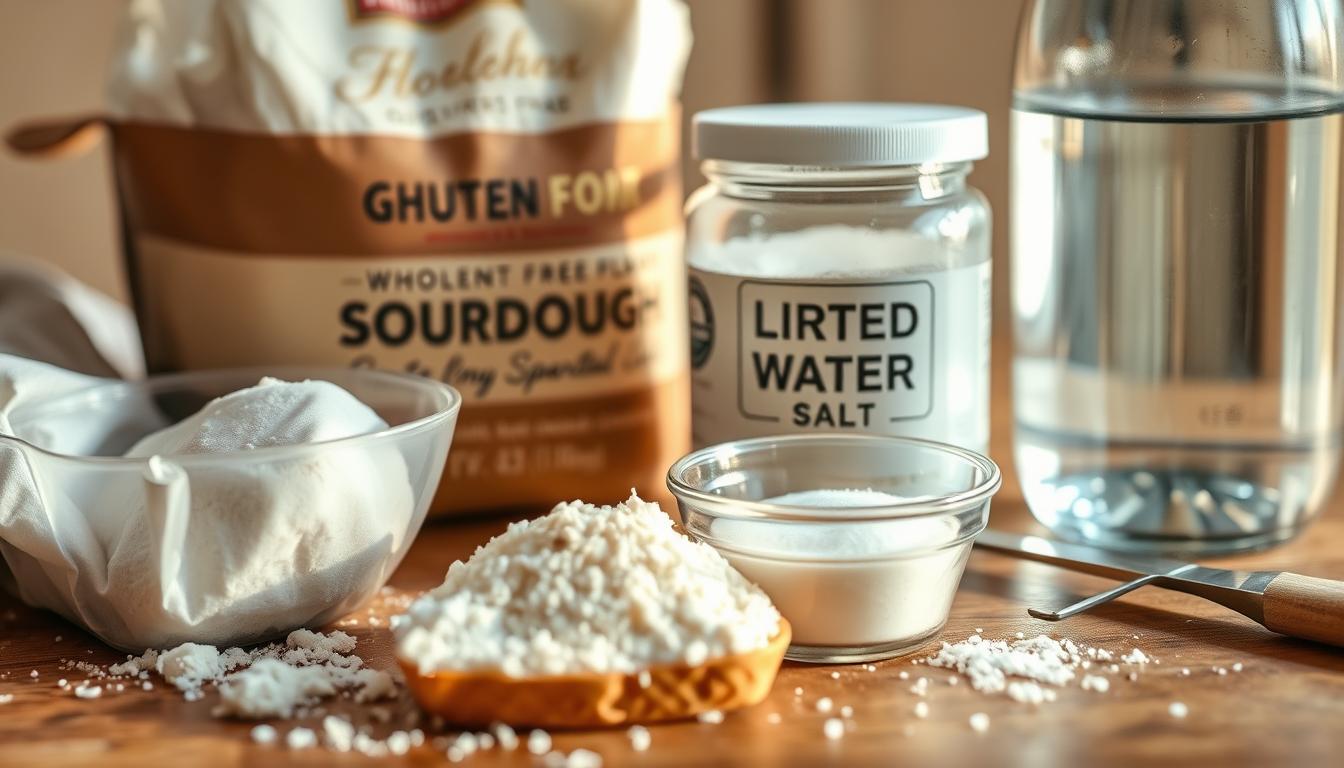
Essential Ingredients for Perfect Gluten Free Sourdough
Creating delicious gluten free pumpkin bread starts with the right ingredients. To make a great gluten-free sourdough, you need to pick the right parts. These parts work together to get the perfect texture and taste.
Your gluten-free baking journey starts with the right flour blend. Not all flours are the same, especially for gluten-free baking.
Best Flour Blends for Gluten-Free Success
- Rice flour: Provides a light, tender crumb
- Sorghum flour: Adds nutty flavor and nutritional value
- Tapioca starch: Helps with binding and texture
- Potato starch: Improves moisture retention
The Magic of Psyllium Husk
Psyllium husk is a game-changer for gluten free pumpkin bread. This magical ingredient acts as a binding agent. It mimics gluten’s structural properties. This helps create a dough that rises better and has a nice texture.
Water and Salt: The Unsung Heroes
Quality water and salt are key for flavor and fermentation. Use filtered water at the right temperature and sea salt. This enhances your sourdough’s taste.
Pro tip: Always use room temperature ingredients for the best gluten-free sourdough results!
By understanding these essential ingredients, you’ll be well on your way to creating delectable gluten-free breads. Everyone can enjoy them.
Creating and Maintaining Your Gluten Free Sourdough Starter

Making a gluten free sourdough starter is a fun journey into the world of baking. It’s different from traditional starters because it needs special care and ingredients. This is key for making great gluten free zucchini bread and other treats.
To start, mix gluten-free flour with water. Pick high-quality flours like rice, sorghum, or millet. These help wild yeasts grow well.
- Select a clean glass jar with a loose lid
- Use room temperature filtered water
- Maintain consistent room temperature (70-75°F)
- Measure ingredients precisely
Feeding your starter is important for its flavor and performance. Consistency is key for your starter. Every day for the first week, throw away half and add fresh flour and water.
Look for these signs of a healthy starter:
- Bubbling activity
- Slight tangy aroma
- Doubling in volume within 4-8 hours
Your starter can make many recipes, like gluten free zucchini bread. With patience and practice, you’ll get a lively starter. It will add depth and character to your gluten-free baking.
Required Equipment and Tools for Success
Starting your gluten-free sourdough journey needs the right tools and equipment. Subway might not have gluten-free bread, but you can make your own. Knowing the essential equipment will help you bake successfully.
Dutch Oven vs. Alternative Baking Methods
The right baking vessel is key for your gluten-free sourdough bread. A Dutch oven is the best choice for home bakers. It creates steam and gives a crispy crust. Other options include:
- Baking stone
- Cast iron skillet
- Ceramic baking dish
Essential Measuring and Mixing Tools
When baking, precision is vital. Your must-have tools are:
- Digital kitchen scale – for accurate ingredient measurements
- Stand mixer or Danish dough whisk
- Accurate measuring cups and spoons
- Instant-read thermometer
Proofing Containers and Bannetons
Proper proofing is key for flavor and structure in gluten-free sourdough. Invest in:
- Banneton baskets for shape and texture
- Proofing containers with lids
- Silicone or cloth-lined bowls
With these tools, you’ll make delicious gluten-free sourdough bread. It will be as good as any commercial bread.
Gluten Free Sourdough Bread Recipe
Making the perfect gluten-free sourdough bread needs care and time. While many think Ezekiel bread is gluten-free (it’s not), this homemade recipe is a tasty choice for those who can’t eat gluten.
With the right ingredients, you’ll make a loaf that’s as good as the real thing. Here’s what you’ll need:
- 300g gluten-free flour blend
- 150g active gluten-free sourdough starter
- 250ml lukewarm water
- 10g sea salt
- 15g psyllium husk (optional)
Understanding your ingredients is key. Gluten-free flours act differently than wheat flour. So, you’ll notice a unique texture and method.
Mixing and Preparation
- Combine dry ingredients in a large mixing bowl
- Add starter and water, mixing until fully incorporated
- Knead the dough for 5-7 minutes
- Cover and let rest for 30 minutes
Proofing is vital for flavor and structure. Gluten-free sourdough needs gentle care to keep its soft texture.
| Stage | Temperature | Time |
|---|---|---|
| First Proof | 75-80°F | 4-6 hours |
| Final Proof | 70-75°F | 2-3 hours |
Your gluten-free sourdough bread will show off your baking talent. Remember, practice makes perfect!
Mastering the Bulk Fermentation Process
Bulk fermentation is key to making great gluten free bread. It turns your sourdough starter into a lively mix. This mix gets complex flavors and is easier to digest. Knowing how to ferment well can make your gluten free bread truly stand out.
Temperature and Time Controls
Keeping the temperature right is vital for good fermentation. Your sourdough needs a warm, steady environment. The best temperatures are between 70-80°F (21-27°C). Keeping these conditions consistent leads to better results.
- Use a reliable kitchen thermometer
- Choose a draft-free area for fermentation
- Consider using a proofing box for consistent temperature
Signs of Proper Fermentation
Knowing when your gluten free bread is fermenting right takes some eye. Look for these signs:
- Increased volume: The dough should grow a bit
- Bubbles forming all over the mix
- A tangy smell starting to come through
- A soft, fluffy texture
Troubleshooting Common Issues
Gluten free sourdough can be tricky. Issues like slow rising, few bubbles, or too wet dough are common. But with patience and practice, you can get better at it.
Pro tip: Keep a fermentation journal to track your progress and learn from each baking experience.
With careful attention and practice, you’ll get the hang of making amazing gluten free bread. It will be as good as what you find in bakeries.
Shaping and Scoring Techniques
Learning to shape gluten free sourdough bread is a special skill. It’s different from traditional bread because of gluten-free flour’s unique properties. You need to be gentle to keep the bread’s delicate structure intact.
Working with gluten free sourdough bread means using certain strategies. These help you handle the dough right:
- Keep your hands wet or dusted with rice flour to prevent sticking
- Use a flexible bench scraper for precise dough manipulation
- Handle the dough with extra care to preserve its fragile air bubbles
Scoring is key for your gluten free sourdough bread‘s look and how it expands. Different patterns can greatly change its appearance and texture.
| Scoring Pattern | Visual Effect | Dough Expansion |
|---|---|---|
| Single Slash | Classic Look | Controlled Rise |
| Cross Pattern | Decorative Design | Balanced Expansion |
| Multiple Parallel Cuts | Artistic Appearance | Increased Volume |
Remember, gluten free sourdough bread needs a gentle touch. Practice your shaping and scoring to get better. This way, you’ll make beautiful, artisan-style loaves that are as tasty as they are pretty.
Baking Methods and Temperature Control
Baking gluten-free sourdough needs precision and skill. Your oven setup is key to a perfect loaf. It should have a crispy outside and a soft inside. Knowing the right baking methods can turn your gluten-free bread crumbs into a tasty treat.
Professional bakers say temperature control is the key to great gluten-free sourdough. They bake at temperatures between 425°F and 450°F. This creates the perfect environment for your bread to grow.
Creating the Perfect Steam Environment
Steam is vital for a beautiful crust and great oven spring. You can make steam in a few ways:
- Use a preheated Dutch oven with a lid
- Place a cast-iron pan with ice cubes on the bottom rack
- Spray water into the oven during the first 15 minutes of baking
Achieving a Golden Crust
To get a stunning golden-brown crust, try these tips:
- Preheat your baking surface well
- Brush the bread with olive oil or egg wash
- Remove the lid or steam source in the last 15-20 minutes of baking
Pro tip: After baking, you can turn leftover gluten-free bread crumbs into a great ingredient. Use them for coating, stuffing, or topping dishes.
Storage and Serving Recommendations
Keeping your gluten free pumpkin bread or sourdough fresh is key. It’s important to store it right to keep its taste and texture. This way, your bread stays delicious for longer.
For short-term storage, keep your bread in an airtight container or bread box at room temperature. This is best for 1-2 days. It keeps the bread fresh and prevents it from drying out.
- Store bread in a cool, dry place
- Use airtight containers to prevent moisture
- Avoid refrigeration, which can dry out bread
For longer storage, slice and freeze your bread. Wrap each slice in plastic wrap, then put them in a freezer-safe bag. Frozen bread can last up to three months if sealed well.
| Storage Method | Duration | Recommended Technique |
|---|---|---|
| Room Temperature | 1-2 Days | Airtight container |
| Freezer Storage | Up to 3 Months | Individually wrapped slices |
When you’re ready to serve, try toasting your bread. It brings back its crispiness and softness. This works great for both sourdough and gluten free pumpkin bread.
Pro tip: Always allow frozen bread to thaw at room temperature before toasting for best results.
Troubleshooting Common Problems
Baking gluten free zucchini bread or sourdough can be tough. Even skilled bakers face issues that affect their bread’s quality. Knowing common problems helps you make delicious gluten-free bread with confidence.
Gluten free baking needs careful attention. Many home bakers face texture and rising challenges. These can make their bread less than perfect.
Addressing Texture Issues
Texture problems are common in gluten free zucchini bread and other gluten-free baked goods. These issues often come from:
- Incorrect flour blend ratios
- Insufficient binding agents
- Improper hydration levels
Fixing Failed Rises
A flat or dense loaf can be caused by several factors:
- Inactive or weak sourdough starter
- Incorrect proofing temperature
- Old or expired leavening agents
Preventing Gummy Interior
A gummy interior can ruin your gluten free zucchini bread. To avoid this, try these tips:
- Ensure proper baking temperature
- Use a combination of gluten-free flour blends
- Allow bread to cool completely before slicing
Pro tip: Patience and practice are key to mastering gluten-free sourdough baking.
Conclusion
Making gluten-free sourdough bread at home changes how you bake. Unlike store-bought options, homemade bread lets you control the taste and ingredients. You can make bread that fits your dietary needs perfectly.
Learning to make gluten-free sourdough opens up new possibilities in cooking. Your homemade bread will be healthier and taste better than store-bought. It might take some time to get the hang of it, but you’ll soon feel more confident in your baking.
Your journey with gluten-free sourdough is about more than just bread. It’s about learning about fermentation and choosing the right ingredients. Each loaf you make is a personal victory, connecting you to old baking traditions while meeting today’s dietary needs.
Start your gluten-free sourdough baking adventure. Your kitchen will become a place of tasty experiments. Every slice of bread will tell a story of your hard work, creativity, and love for cooking.
FAQ
What is gluten-free sourdough bread?
Gluten-free sourdough bread is made without wheat or gluten. It uses special flour blends and a fermentation process. This makes it tangy and easier to digest. It’s great for those with celiac disease or gluten sensitivities.
How is gluten-free sourdough different from regular sourdough?
Gluten-free sourdough uses flours like rice or sorghum instead of wheat. It needs binders like psyllium husk for structure. It also uses special fermentation techniques to get flavor and texture without gluten.
Can I make gluten-free bread crumbs from this sourdough?
Yes! Dry out leftover sourdough and grind it into crumbs. Use these crumbs for breading or as a topping for casseroles.
Is maintaining a gluten-free sourdough starter difficult?
It takes regular care, but it’s not hard. Feed it gluten-free flour, keep it at the right temperature, and watch for fermentation signs. With time, you’ll have a strong and tasty starter.
Can I adapt this recipe for other gluten-free baked goods?
Absolutely! Use your starter for pumpkin or zucchini bread. A good gluten-free starter opens up many baking possibilities.
Does Subway offer gluten-free bread?
Subway has gluten-free bread in some places, but there’s a risk of cross-contamination. Making your own ensures you control the ingredients and preparation, making it safer and tastier.
Is Ezekiel bread gluten-free?
No, Ezekiel bread is not gluten-free. It’s made from sprouted grains like wheat and barley. People with gluten issues should avoid it and choose gluten-free options instead.
What equipment do I need to make gluten-free sourdough?
You’ll need a kitchen scale, mixing bowls, a Dutch oven or baking stone, and a proofing container. Also, a bench scraper and scoring tool are essential. The right tools and measurements are key for gluten-free sourdough success.
How long can I store gluten-free sourdough bread?
Enjoy homemade gluten-free sourdough within 2-3 days at room temperature. For longer storage, slice and freeze it. This keeps the bread’s texture and allows you to enjoy it longer.
Tried This Recipe? Tell Us How It Went!
There are no reviews yet. Be the first one to write one.