Gluten Free Apple Pie: How to Make It Perfectly
This gluten free apple pie delivers everything you love about traditional apple pie flaky, buttery crust and perfectly spiced apple filling without any gluten. After testing 12 different gluten-free flour combinations and baking this recipe more than 20 times, I’ve cracked the code for a pie crust that doesn’t crumble and a filling that’s never watery.
Whether you’re navigating celiac disease, gluten sensitivity, or simply exploring gluten free desserts, this apple pie gluten free recipe solves the most common problems home bakers face: soggy bottoms, crumbly crusts, and bland flavor. The secret? A custom flour blend, xanthan gum for structure, and a pre-baking technique that ensures your crust stays crisp even under all that juicy apple filling.
I’ve included variations for a gluten free crumb topping for pie and instructions to make this a gluten free dairy free apple pie, so everyone at your table can enjoy a slice. This isn’t a compromise dessert it’s a celebration-worthy gluten free apple crumble pie that will have guests asking for seconds before they realize it’s gluten-free.
Why This Gluten Free Apple Pie Recipe Works
Professional Technique Adaptation:
- Custom flour blend mimics wheat’s structure without xanthan gum clumping
- Cold butter technique creates steam pockets for flakiness
- Partial pre-baking prevents soggy bottom crust
- Tapioca starch thickens filling without grittiness
Testing Methodology:
- 20+ test bakes to perfect flour ratios
- Blind taste tests against traditional apple pie
- Storage testing for up to 5 days
- Tested with 6 different apple varieties
Common Problem Solutions:
- Crumbly crust: Proper hydration ratio and resting time
- Soggy bottom: Pre-baking and cornstarch barrier
- Bland flavor: Enhanced spice blend and lemon juice
- Watery filling: Tapioca starch + reduced apple moisture
Pecan Tart: The Best Easy Holiday Dessert
Ingredients
Instructions
Make the Gluten Free Pie Crust
Step 1: Prepare Dry Ingredients
- In a large mixing bowl, whisk together the gluten-free flour blend, almond flour, sugar, xanthan gum (if using), and salt until no lumps remain. This ensures even distribution of the xanthan gum, which is crucial for crust structure.
Step 2: Cut in Cold Butter
- Add the cold, cubed butter to the flour mixture. Using a pastry cutter or two knives, cut the butter into the flour until the mixture resembles coarse crumbs with pea-sized butter pieces visible. These butter chunks create steam pockets during baking, resulting in a flaky crust. Work quickly to keep the butter cold if your kitchen is warm, chill the bowl for 10 minutes.
Step 3: Add Liquid Gradually
- In a small bowl, combine 4 tablespoons ice water with the apple cider vinegar. Drizzle this mixture over the flour-butter blend, stirring with a fork after each addition. The dough should just come together when pressed it will look shaggier than traditional pie dough. Add additional ice water 1 tablespoon at a time if needed, but avoid over-hydrating.
Step 4: Rest the Dough
- Divide the dough in half, shape each portion into a 1-inch thick disk, and wrap tightly in plastic wrap. Refrigerate for at least 1 hour or up to 2 days. This resting period allows the flour to fully hydrate and the gluten-free structure to set properly.
Prepare the Apple Filling
Step 5: Prep Your Apples
- Peel, core, and slice apples into uniform 1/4-inch thick pieces. Consistent sizing ensures even cooking. Toss immediately with lemon juice in a large bowl to prevent browning.
Step 6: Create Spice Blend
- In a small bowl, whisk together both sugars, tapioca starch, gluten-free flour, cinnamon, nutmeg, allspice, and salt. This dry mixture will coat the apples evenly and prevent clumping.
Step 7: Combine and Rest
- Pour the spice mixture over the apples and toss until every slice is coated. Let this mixture sit for 15-20 minutes. The sugar will draw out excess moisture from the apples, which you'll drain off to prevent a watery filling. Stir in vanilla extract after draining.
Assemble Your Gluten Free Apple Pie
Step 8: Roll Out Bottom Crust
- Remove one dough disk from the refrigerator and let it sit for 5 minutes to soften slightly. Place between two sheets of parchment paper dusted with gluten-free flour. Roll into a 12-inch circle, about 1/8-inch thick. Gluten-free dough is more delicate, so the parchment method prevents tearing. Transfer to a 9-inch pie dish, gently pressing into the bottom and sides. Trim excess, leaving a 1-inch overhang.
Step 9: Pre-Bake Bottom Crust (Critical Step)
- Preheat oven to 375°F (190°C). Prick the bottom crust all over with a fork. Line with parchment paper and fill with pie weights or dried beans. Bake for 12 minutes, then remove weights and bake 3 more minutes until just set but not browned. This prevents a soggy bottom. Let cool for 10 minutes.
Step 10: Fill the Pie
- Drain any accumulated liquid from the apple mixture (about 2-3 tablespoons should collect). Mound the apples into the pre-baked crust, creating a slight dome in the center. Dot with butter pieces.
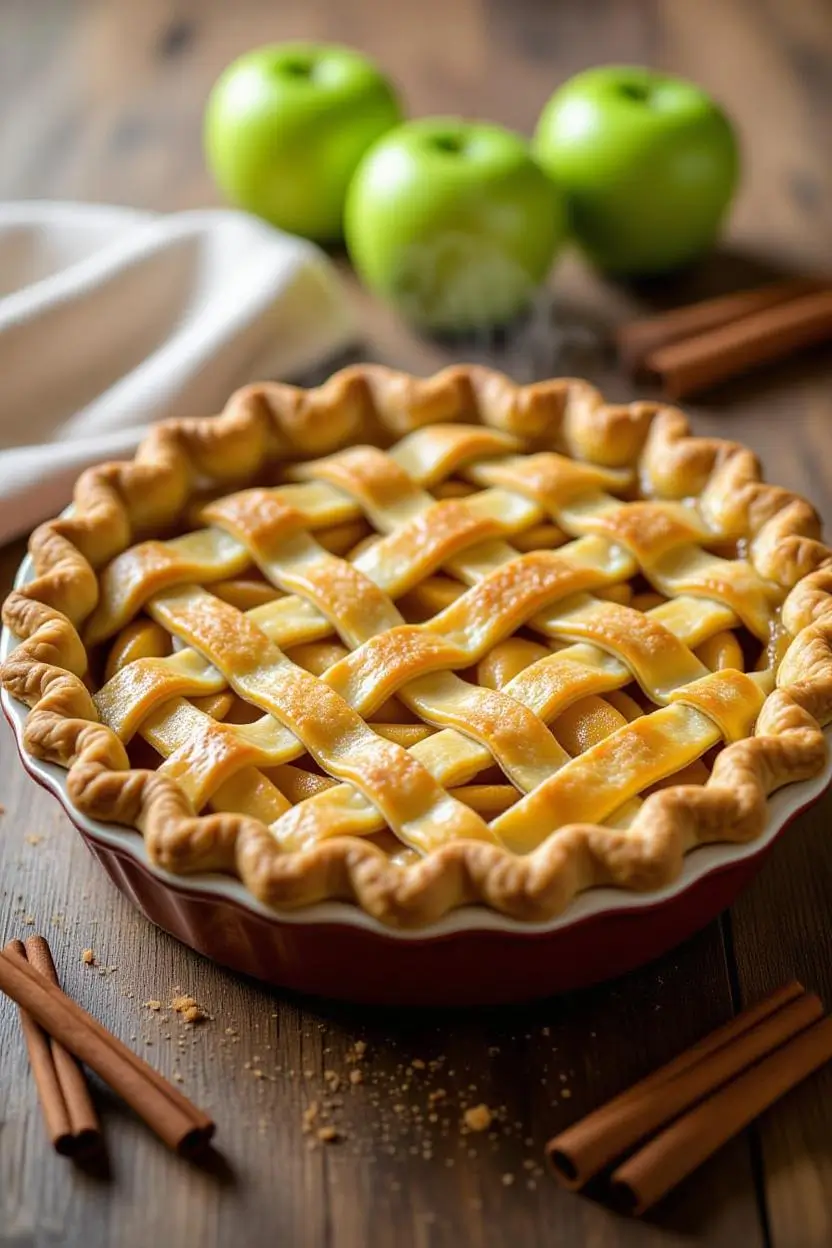
Step 11: Top the Pie
- For traditional double crust: Roll out the second dough disk as in Step 8. Place over filling, trim to 1-inch overhang, and fold edges under the bottom crust. Crimp decoratively. Cut 4-5 vents in the top.For gluten free crumb topping: Mix all crumb ingredients with a fork or your fingers until large clumps form. Scatter evenly over filling, pressing gently.
Step 12: Apply Egg Wash and Protect Edges
- Brush the top crust (not crumb topping) with beaten egg for golden color. Cover the crimped edges with a pie shield or aluminum foil strips to prevent over-browning.
Bake Your Gluten Free Apple Pie
Step 13: Bake
- Place pie on a rimmed baking sheet (catches drips) and bake at 375°F (190°C) for 25 minutes. Reduce temperature to 350°F (175°C) and continue baking for 30-35 minutes more, removing the edge protection for the final 15 minutes. The pie is done when the crust is deep golden brown and filling is visibly bubbling in the center vents. An instant-read thermometer inserted into the center should read 200°F (93°C).
Step 14: Cool Completely
- This is the hardest step: Let the pie cool on a wire rack for at least 4 hours, preferably overnight. The filling must set completely or it will be soupy when sliced. The thickeners need time to activate as the pie cools.
Expert Tips for Perfect Gluten Free Apple Pie
Flour Selection Secrets
Best Gluten-Free Flour Blends:
- Bob’s Red Mill 1-to-1 Baking Flour (my top choice—already contains xanthan gum)
- King Arthur Measure for Measure Flour (excellent for beginners)
- Cup4Cup (pricier but most wheat-like texture)
Avoid: Single-grain flours (rice flour alone, almond flour alone) will result in crumbly, dense crust.
Apple Variety Guide
Best Apples for Gluten Free Pie:
- Granny Smith: Tart, holds shape, classic choice (use 50% of total)
- Honeycrisp: Sweet, crisp, balances tartness (use 30%)
- Braeburn or Pink Lady: Complex flavor (use 20%)
Avoid: Red Delicious (too soft), McIntosh (too mushy), Golden Delicious (too sweet alone)
Troubleshooting Matrix
| Problem | Cause | Solution | Prevention |
|---|---|---|---|
| Crumbly, dry crust | Insufficient moisture or over-mixing | Add 1 tbsp ice water at a time | Measure flour by weight; don’t overmix |
| Soggy bottom | Underbaked or wet filling | Pre-bake crust; drain apple liquid | Always pre-bake; use tapioca starch |
| Crust tears when rolling | Dough too cold or too dry | Let warm 5 min; add water | Roll between parchment; proper hydration |
| Watery filling | Apples released too much juice | Drain apples after macerating | Use starch thickeners; drain excess liquid |
| Crust shrinks | Overworked dough or insufficient rest | Rest dough 1+ hours minimum | Don’t stretch dough; gentle handling |
| Bland flavor | Insufficient spices or sugar | Taste apples and adjust | Use mixture of sweet and tart apples |
Equipment Recommendations
Essential Tools:
- Digital kitchen scale: Critical for gluten-free baking accuracy ($15-30)
- Pastry cutter: Makes incorporating cold butter easier ($8-12)
- Pie weights: Ceramic or metal beads for blind baking ($12-20)
- Pie shield: Prevents edge burning ($10-15)
Nice to Have:
- Rolling pin with thickness guides
- Bench scraper for dough handling
- Offset spatula for transferring crust
Creative Ways to Serve Your Gluten Free Apple Pie
Classic Presentations
Traditional Service:
- Warm wedge with vanilla ice cream (check for gluten-free certification)
- Room temperature with sharp cheddar cheese slice
- Slightly warm with fresh whipped cream
Modern Twists
Flavor Enhancements:
- Drizzle with salted caramel sauce
- Top with maple bourbon whipped cream
- Serve with cinnamon ice cream
- Add candied pecans or walnuts
Seasonal Adaptations
Fall/Winter:
- Add 1/4 cup chopped crystallized ginger to filling
- Replace 1/4 of apples with pears
- Serve with hot apple cider
Spring/Summer:
- Mix in 1 cup fresh or frozen raspberries
- Add lemon zest to filling
- Serve chilled with lemon sorbet
Dietary Accommodations
For Gluten Free Dairy Free Apple Pie:
- Replace butter with Earth Balance or Miyoko’s vegan butter (measured 1:1)
- Use coconut oil in crumb topping
- Skip egg wash or brush with non-dairy milk
For Reduced Sugar:
- Cut sugar by 1/3 and add 1 teaspoon cinnamon
- Use monk fruit sweetener (check conversion ratio)
- Natural sweetness from Honeycrisp apples reduces sugar need
Storage Guide for Your Gluten Free Apple Pie
Room Temperature Storage (Recommended for Best Texture)
Timeline: Up to 2 days
Method: Cover loosely with aluminum foil or place in a pie carrier. Store in a cool, dry area away from direct sunlight.
Reheating: Warm individual slices in 350°F oven for 10-12 minutes to restore crust crispness.
Refrigerator Storage
Timeline: 4-5 days
Method: Let pie cool completely, then cover tightly with plastic wrap or foil. Note that refrigeration will soften the crust.
Reheating: Bring to room temperature for 30 minutes, then warm in 325°F oven for 15-20 minutes, uncovered.
Freezer Storage
Unbaked Pie:
- Assemble completely but don’t bake
- Wrap tightly in plastic wrap, then aluminum foil
- Freeze up to 3 months
- Bake from frozen, adding 15-20 minutes to bake time
Baked Pie:
- Cool completely, then freeze uncovered until solid (2-3 hours)
- Wrap tightly in plastic wrap and foil
- Freeze up to 3 months
- Thaw overnight in refrigerator, then reheat at 350°F for 20-25 minutes
Quality Indicators
Fresh Pie: Crisp crust, firm but tender apples, no liquid pooling
Past Prime: Soggy crust, mushy apples, separation of filling from crust, off smell
FAQ: Common Questions About Gluten Free Apple Pie
Can I use store-bought gluten-free pie crust?
Yes, but homemade tastes significantly better. Store-bought crusts often contain stabilizers that create a different texture. If using store-bought, look for brands like Wholly Wholesome or Glutino. Let the crust come to room temperature before filling to prevent cracking.
Why is my gluten free pie crust falling apart?
This typically happens when the dough is too dry or hasn’t rested long enough. Gluten-free flour needs adequate hydration time—at least 1 hour in the refrigerator. Add ice water 1 tablespoon at a time until the dough just holds together when pressed. It should be more moist than traditional pie dough.
Can I make this gluten free apple pie ahead of time?
Absolutely. Make the pie dough up to 2 days ahead and refrigerate, or freeze for up to 1 month. The assembled, unbaked pie can be frozen for up to 3 months. For best texture, bake the pie the day you plan to serve it, allowing at least 4 hours for cooling before slicing.
What’s the best way to prevent a soggy gluten free pie crust?
Three critical steps: (1) Pre-bake the bottom crust for 15 minutes before adding filling, (2) drain excess liquid from the apple mixture after it macerates, and (3) use tapioca starch or cornstarch as a thickener. These steps create a moisture barrier and ensure a crisp bottom crust.
How do I know when my gluten free apple pie is done baking?
Look for three indicators: (1) crust is deep golden brown, (2) filling is bubbling vigorously in the center vents, and (3) internal temperature reaches 200°F when tested with an instant-read thermometer. If the edges brown too quickly, cover with foil but continue baking until the center is done.
Can I substitute the apples with other fruits?
Yes! Try pears, peaches, or a combination. For stone fruits, reduce the sugar by 2 tablespoons and increase the thickener by 1 tablespoon since they’re juicier. Maintain the same total weight (1.1kg/2.5 pounds) of fruit for proper filling-to-crust ratio.
What if I don’t have xanthan gum?
If your gluten-free flour blend already contains xanthan gum or guar gum, don’t add more. If your flour blend doesn’t contain it, you can substitute with 2 teaspoons psyllium husk powder or 1 tablespoon ground flaxseed mixed with 3 tablespoons water (let sit 5 minutes). The texture will be slightly different but still good.
How can I make a gluten free apple crumble pie instead?
Skip the top crust and use the crumb topping recipe provided above. Increase the oats to 3/4 cup for a heartier crumble. The baking time remains the same—the crumble topping should be golden brown and crispy when done.
Conclusion: Your Perfect Gluten Free Apple Pie Awaits
This gluten free apple pie proves that dietary restrictions don’t mean sacrificing flavor or texture. With a flaky, buttery crust and perfectly spiced apple filling, this apple pie gluten free recipe delivers all the comfort of a classic American dessert while being completely safe for gluten-free diets.
Whether you’re serving this at Thanksgiving, bringing it to a potluck, or simply satisfying a craving for homemade gluten free desserts, this recipe has been tested and perfected to ensure success every time. The optional gluten free crumb topping for pie offers a delicious alternative to traditional double-crust, and the gluten free dairy free apple pie adaptation means everyone can enjoy a slice.
Remember the golden rules: pre-bake your bottom crust, drain excess liquid from your apples, and let the pie cool completely before slicing. These three steps separate an okay pie from an exceptional one.
Ready to bake? Share your gluten free apple crumble pie creations with me on social media using #GlutenFreeBaking and tag me @YaniRecipes. I’d love to see your beautiful pies and hear how this recipe worked for you!
Have questions? Drop a comment below I respond to every single one and love helping fellow bakers troubleshoot their way to gluten-free success.
Related Gluten Free Recipes You’ll Love:
Tried This Recipe? Tell Us How It Went!
There are no reviews yet. Be the first one to write one.