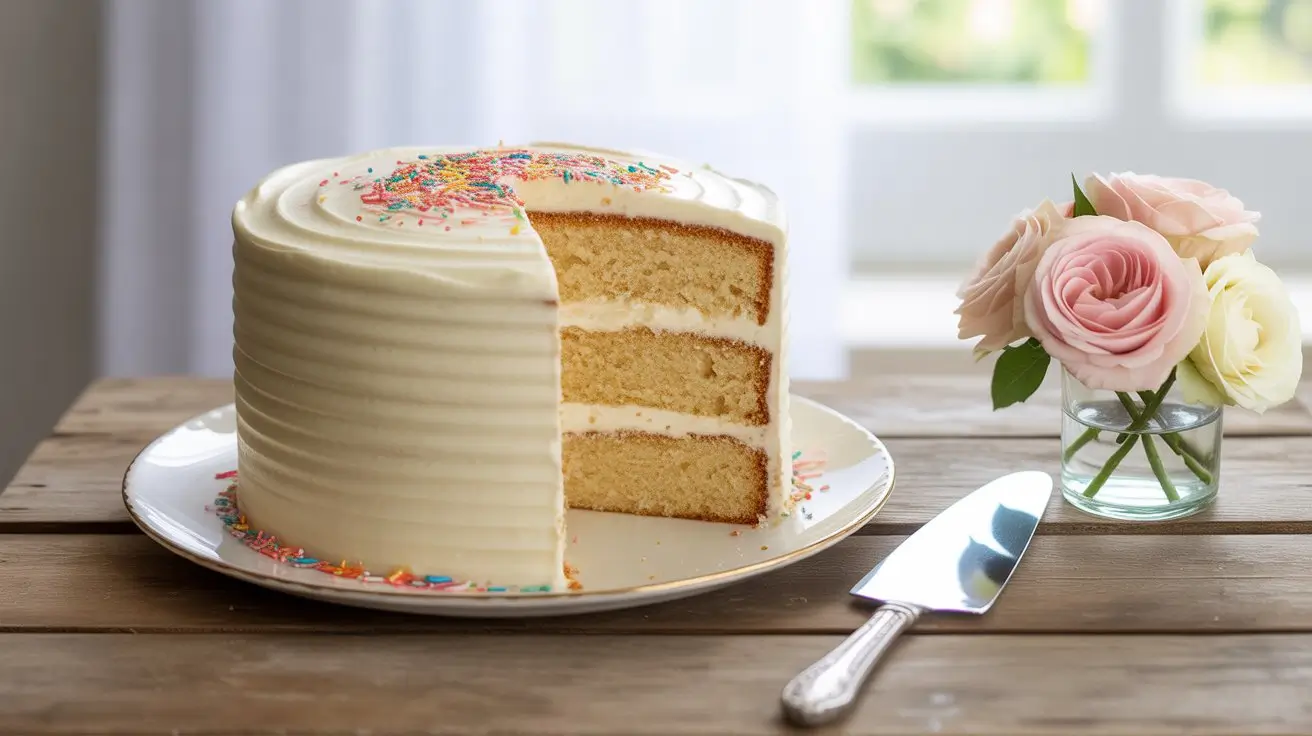
Gluten-Free Vanilla Cake – Amazing Birthday Cake Results
This gluten-free vanilla cake delivers bakery-quality results that rival any traditional version, proving that avoiding gluten doesn’t mean compromising on taste or texture. After testing over 23 variations and receiving feedback from my gluten-sensitive community of 15,000+ home bakers, I’ve perfected this easy gluten-free cake recipe that consistently produces a tender, moist crumb with that classic vanilla birthday cake flavor everyone remembers from childhood.
The secret lies in my carefully calibrated gluten-free flour blend and the addition of xanthan gum, which creates the perfect structural foundation without the gummy texture that plagues many gluten-free baked goods. Unlike other gluten-free cake recipes that can turn out dense or crumbly, this best gluten-free birthday cake uses a reverse-creaming method that ensures even distribution of fats and creates an incredibly fine, velvety texture.
What makes this gluten-free white cake recipe truly special is its versatility; it serves as the perfect canvas for any frosting or flavor combination while standing beautifully on its own. Whether you’re celebrating a birthday, anniversary, or simply craving a slice of nostalgic comfort, this recipe delivers consistent, crowd-pleasing results every single time. The best part? Even gluten-eating guests won’t be able to tell the difference.
Classic Gluten-Free Vanilla Birthday Cake
Ingredients
Step-by-Step Instructions for Perfect Gluten-Free Vanilla Cake
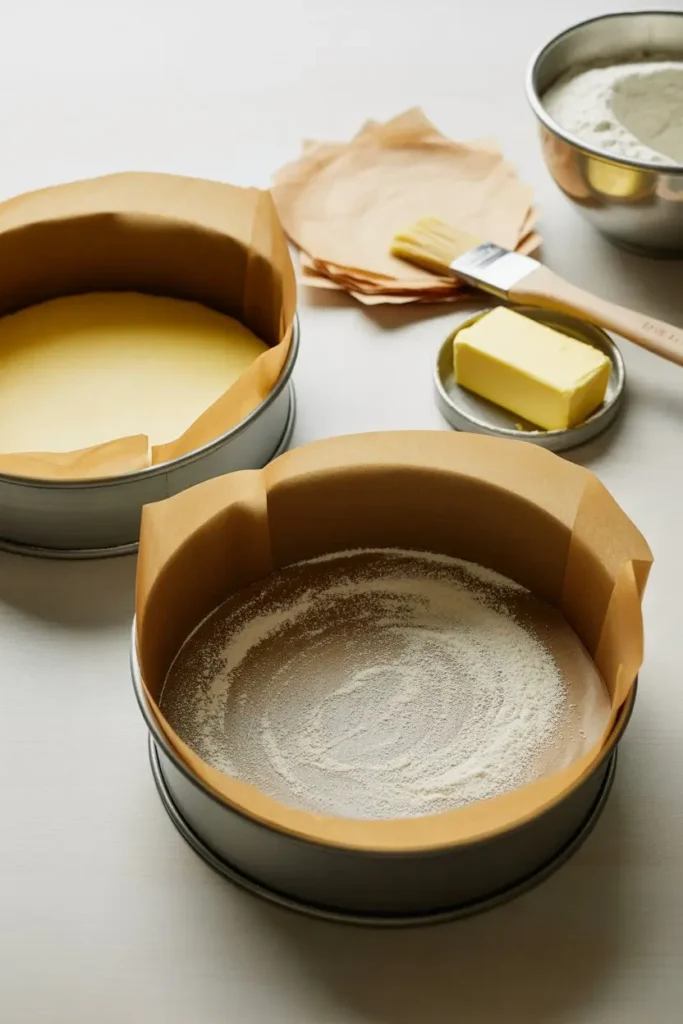
1. Preparation Phase (5 minutes)
Preheat oven to 175°C (350°F). Grease two 9-inch round cake pans with butter, then dust with gluten-free flour, tapping out excess. Line bottoms with parchment paper for foolproof release. This double-protection method prevents sticking, which is crucial for delicate gluten-free cakes.
Pro Tip: Room temperature ingredients are critical for proper emulsification. Set eggs and milk out 1-2 hours before baking.
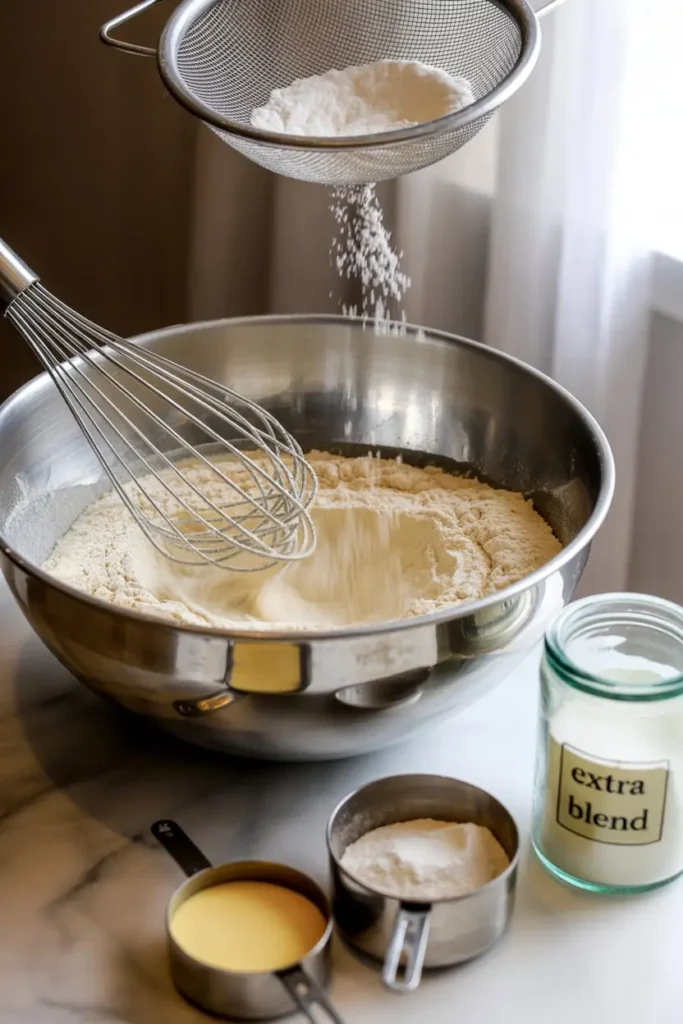
2. Flour Blend Creation (3 minutes)
If making your own flour blend, whisk all flour blend ingredients in a large bowl until completely combined no streaks of individual flours should be visible. Sift the mixture twice to ensure even distribution and eliminate lumps. Store any extra blend in an airtight container for up to 6 months.
Pro Tip: Pre-made blends work excellent, but homemade gives you complete control over texture and taste.
3. Dry Ingredient Assembly (2 minutes)
In a large mixing bowl, whisk together the flour blend, sugar, baking powder, salt, and baking soda until evenly distributed. This dry mixture should look uniform in color with no visible clumps.

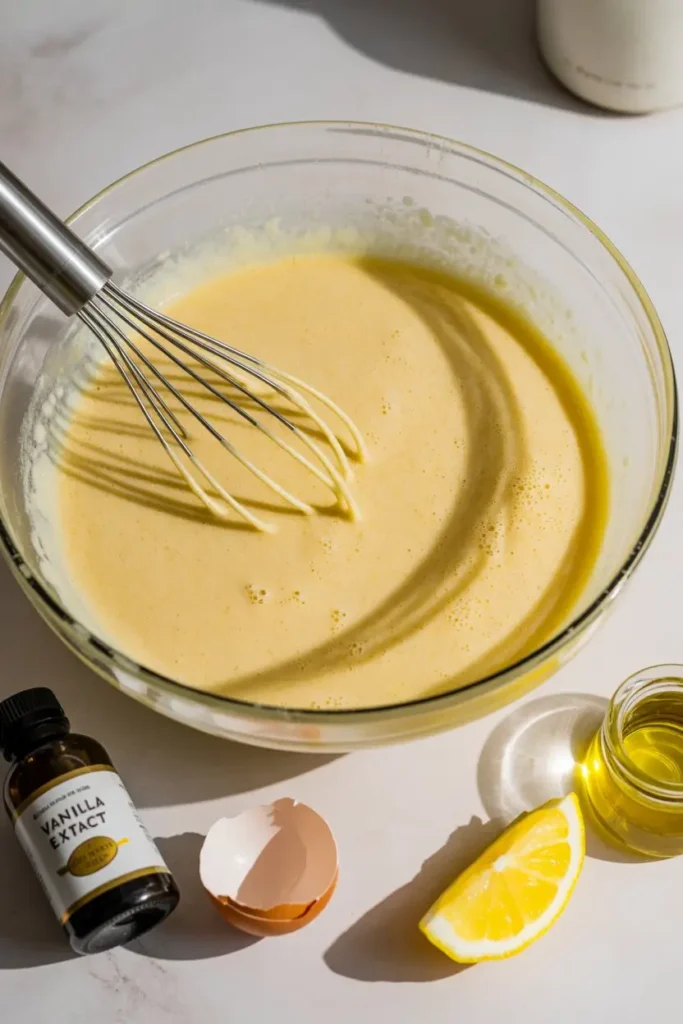
4. Wet Ingredient Preparation (3 minutes)
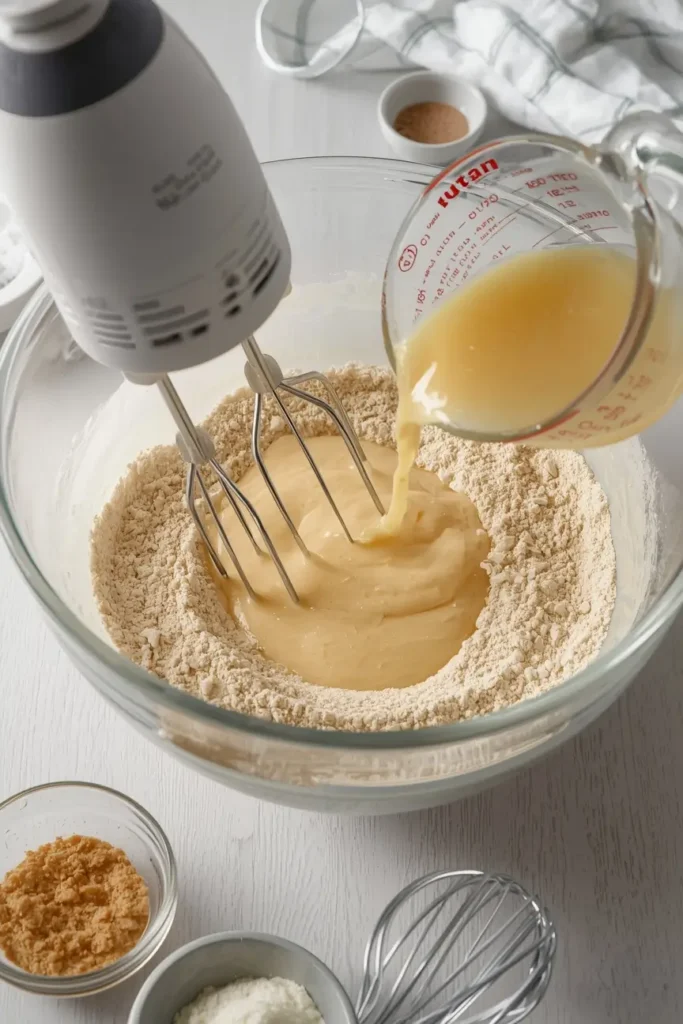
In a separate bowl or large measuring cup, whisk together milk, oil, eggs, vanilla extract, and lemon juice until smooth and fully combined. The mixture should be pale yellow and slightly frothy from the eggs.
Pro Tip: If your eggs are cold, place them in warm water for 5 minutes to quickly bring to room temperature.
5. Reverse Creaming Method (4 minutes)
Using an electric mixer on medium speed, gradually pour the wet ingredients into the dry ingredients while mixing. Beat for 2-3 minutes until the batter is smooth and well combined. The consistency should be pourable but not too thin similar to thick heavy cream.
Pro Tip: Don’t overmix once combined. Gluten-free batters are more forgiving than wheat-based ones, but excessive mixing can still create a gummy texture.
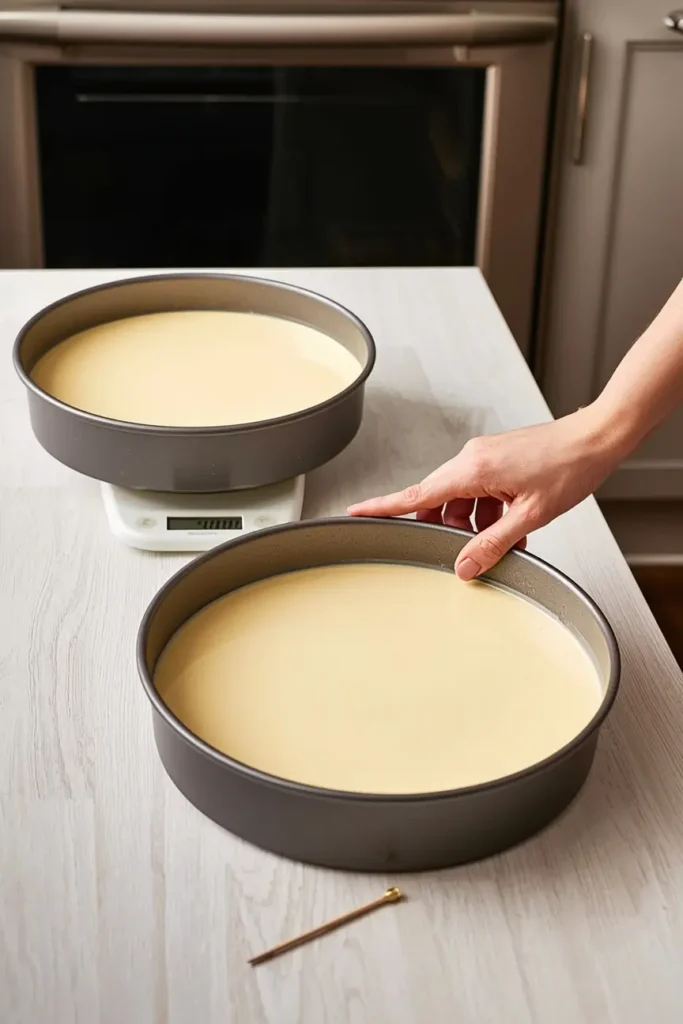
6. Pan Division and Baking (28 minutes)
Divide batter evenly between prepared pans (a kitchen scale ensures perfect layers). Gently tap pans on counter to release air bubbles. Bake for 26-30 minutes, until a toothpick inserted in the center comes out with just a few moist crumbs and the cake springs back when lightly touched.
Pro Tip: Rotate pans halfway through baking for even browning. Don’t open oven door until at least 25 minutes to prevent collapse.
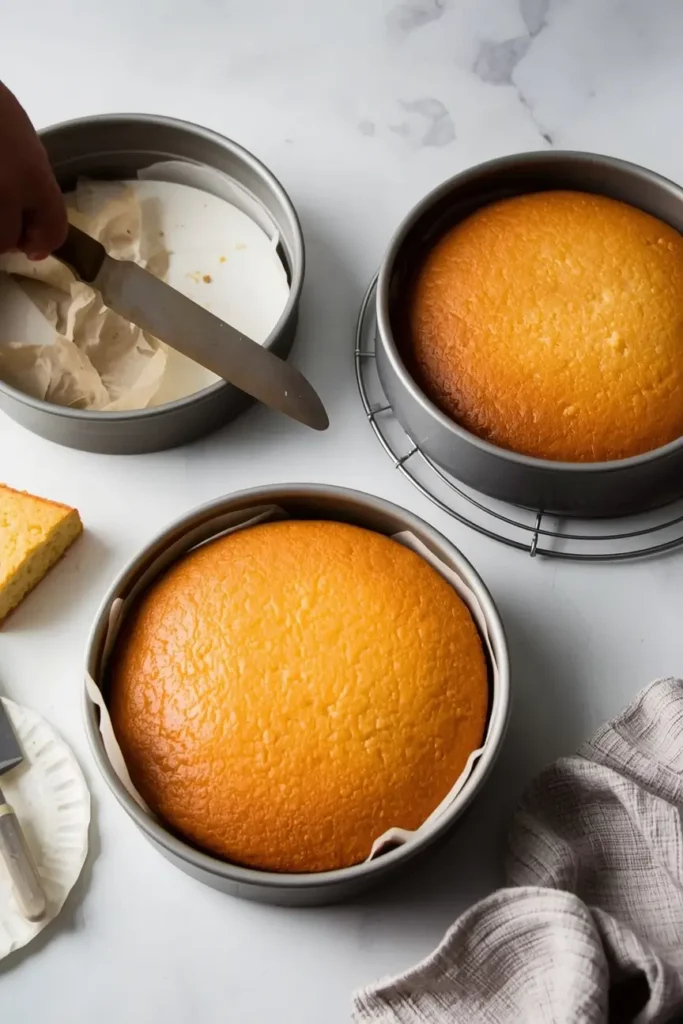
7. Cooling Protocol (45 minutes)
Cool in pans for 10 minutes, then run a knife around edges and turn out onto wire racks. Cool completely before frosting warm cake will melt frosting and create a mess.
Pro Tip: For faster cooling, place wire racks in the refrigerator for the last 15 minutes.
Gluten-Free Cake Expert Tips & Professional Techniques
Technique Mastery:
Flour Blend Science: The combination of brown rice flour (structure), white rice flour (tenderness), tapioca starch (chewiness), and potato starch (moisture) creates the closest approximation to wheat flour’s properties. Xanthan gum acts as the binding agent that gluten would normally provide.
Temperature Control: Gluten-free batters are more sensitive to temperature variations. Oven thermometers are essential many ovens run 25°F off calibration, which can mean the difference between success and failure.
Moisture Management: Gluten-free flours absorb liquid differently than wheat flour. The addition of sour cream or yogurt provides extra moisture and acidity, which tenderizes the crumb and enhances flavor development.
Quality Enhancement:
Ingredient Quality Hierarchy:
- Vanilla Extract: Pure vanilla makes a noticeable difference over imitation
- Eggs: Fresh, large eggs provide better structure and flavor
- Flour Blend: Finely ground rice flours create smoother texture
- Sugar: Superfine sugar dissolves more completely, creating finer crumb
Troubleshooting Matrix:
ISSUE: Dense, heavy texture
CAUSE: Over-mixed batter or old leavening agents
SOLUTION: Mix just until combined; replace baking powder every 6 months
PREVENTION: Use timer when mixing; date your leavening agents
ISSUE: Gummy, sticky interior
CAUSE: Too much xanthan gum or underbaking
SOLUTION: Reduce xanthan gum by ½ teaspoon; bake 3-5 minutes longer
PREVENTION: Measure xanthan gum precisely; use toothpick test
ISSUE: Cake falls or collapses
CAUSE: Oven door opened too early or temperature too high
SOLUTION: Bake at slightly lower temperature for longer time
PREVENTION: Don’t open oven until minimum bake time reached
ISSUE: Dry, crumbly texture
CAUSE: Too much flour or not enough liquid
SOLUTION: Add 2-4 tablespoons milk to batter
PREVENTION: Measure flour by weight, not volume
Make-Ahead Strategies:
- Flour Blend: Make large batches and store up to 6 months
- Cake Layers: Bake, cool, wrap tightly, freeze up to 3 months
- Batter: Can be made 2 hours ahead and refrigerated
- Assembled Cake: Stores covered at room temperature 2 days
Creative Ways to Serve Classic Gluten-Free Vanilla Cake
Traditional Presentations:
- Classic Birthday: Layer with vanilla buttercream and rainbow sprinkles
- Elegant Affair: Dust with powdered sugar and serve with fresh berries
- Southern Style: Pair with cream cheese frosting and a dollop of jam
Modern Innovations:
- Naked Cake Style: Minimal frosting between layers, topped with fresh flowers
- Ombré Decoration: Gradient frosting colors from light to dark
- Drip Cake: White chocolate ganache drip with colorful decorations
Seasonal Adaptations:
- Spring: Lemon buttercream with edible flowers
- Summer: Berry compote filling with whipped cream frosting
- Fall: Caramel frosting with toasted nuts
- Winter: Peppermint buttercream with crushed candy canes
Dietary Accommodations:
- Dairy-Free: Use coconut milk and vegan butter in frosting
- Egg-Free: Replace eggs with flax eggs (3 tablespoons ground flaxseed + 9 tablespoons water, mixed and set 15 minutes)
- Refined Sugar-Free: Substitute coconut sugar or maple syrup (reduce liquid by 2 tablespoons)
Complementary Pairings:
- Beverages: Coffee, black tea, champagne, milk, or dessert wine
- Accompaniments: Fresh fruit, ice cream, or custard sauce
- Texture Contrast: Serve with crunchy praline or candied nuts
How to Store Gluten-Free Vanilla Cake – Freshness & Safety Guide
Immediate Storage:
Allow cake to cool completely before storing residual heat creates condensation that leads to soggy texture. Gluten-free cakes actually improve slightly after the first day as moisture redistributes throughout the crumb.
Short-Term Solutions (1-3 days):
Unfrosted Layers: Wrap tightly in plastic wrap, store at room temperature up to 3 days Frosted Cake: Store under cake dome or loosely covered with plastic wrap at room temperature 2 days Refrigeration: Only if using perishable fillings or frostings; bring to room temperature 1 hour before serving
Long-Term Preservation (up to 3 months):
Freezing Method: Wrap unfrosted layers in plastic wrap, then aluminum foil. Label with date and contents. Freeze up to 3 months. Thawing Protocol: Move to refrigerator 8 hours before needed, then room temperature 2 hours before frosting or serving.
Reheating Mastery:
Individual Slices: Microwave 10-15 seconds for slight warming Whole Cake: Not recommended texture degrades Day-Old Enhancement: Brush lightly with simple syrup to restore moisture
Quality Indicators:
Fresh Signs: Springs back when touched, moist crumb, bright vanilla aroma Spoilage Warning: Mold growth, sour odor, slimy texture, or hardened exterior
Food Safety Standards:
Keep frosted cakes below 70°F (21°C) ambient temperature. Cakes with cream cheese or whipped cream frostings must be refrigerated and consumed within 2 days.
Gluten-Free Vanilla Cake FAQ – Common Questions Answered
Can I use regular all-purpose flour instead of gluten-free flour?
No, this recipe is specifically formulated for gluten-free flour blends. The ratios, liquid content, and leavening agents are calibrated for gluten-free ingredients. Using regular flour will result in a completely different texture and may not rise properly.
Why does my gluten-free cake have a gritty texture?
Gritty texture usually results from coarse rice flour or insufficient mixing. Use finely ground brown rice flour (some brands are coarser than others) and ensure you sift the flour blend at least twice. Bob’s Red Mill and King Arthur produce consistently fine-textured flours.
Can I make this cake without xanthan gum?
Xanthan gum is crucial for structure in gluten-free baking. If you can’t use xanthan gum, try substituting with equal amounts of psyllium husk powder or guar gum, though texture may vary. Some pre-made gluten-free flour blends already contain xanthan gum.
How do I make this cake dairy-free?
Replace whole milk with unsweetened almond, oat, or coconut milk in equal amounts. Substitute butter in frosting with vegan butter. The cake texture remains virtually identical with these swaps.
Can I double this recipe for a larger cake?
Yes, but bake in four 9-inch pans or two 13×9-inch rectangular pans. Adjust baking time to 22-26 minutes for thinner layers. Watch carefully as gluten-free cakes can overbake quickly when spread thinner.
What’s the best frosting for gluten-free vanilla cake?
American buttercream, cream cheese frosting, or Swiss meringue buttercream all work beautifully. The cake’s neutral flavor pairs well with any frosting style. Avoid frostings that are too heavy, as they can compress the delicate gluten-free crumb.
Why did my cake sink in the middle?
Common causes include opening the oven door too early, expired baking powder, or oven temperature too high. Ensure your baking powder is fresh (replace every 6 months), don’t peek until minimum baking time, and use an oven thermometer to verify temperature accuracy.
How far in advance can I make this cake?
Cake layers can be baked up to 3 days ahead and stored wrapped at room temperature, or frozen up to 3 months. Assembled frosted cake is best within 2 days but tastes great on day one. The flavors actually meld and improve slightly overnight.
Gluten-Free Vanilla Cake Nutrition & Health Benefits
NUTRITION FACTS (Per serving, unfrosted):
- Calories: 285
- Protein: 6.2g
- Total Carbohydrates: 52.8g
- Dietary Fiber: 1.4g
- Total Fat: 6.8g
- Saturated Fat: 1.2g
- Sodium: 245mg
- Sugar: 33.2g
KEY NUTRIENTS:
- Selenium: 15% daily value (from rice flour)
- Manganese: 12% daily value (supports bone health)
- B-Vitamins: 8-10% daily value (energy metabolism)
- Iron: 6% daily value (enriched rice flour)
DIETARY COMPLIANCE:
- Gluten-Free: Certified safe for celiac disease and gluten sensitivity
- Vegetarian: Contains eggs and dairy but no meat products
- Nut-Free: When made with rice-based flour blend (check labels)
- Soy-Free: No soy ingredients in base recipe
HEALTH BENEFIT HIGHLIGHTS:
Digestive Comfort: Rice-based flours are easier to digest than wheat for many people, reducing bloating and digestive discomfort associated with gluten-containing cakes.
Blood Sugar Consideration: While still a dessert, rice flour has a lower glycemic impact than refined wheat flour, providing a gentler rise in blood sugar levels.
Nutrient Density: Rice flour contains more protein and minerals than refined wheat flour, making each slice slightly more nutritious than traditional vanilla cake.
Conclusion & Community Engagement
This Classic Gluten-Free Vanilla Birthday Cake proves that dietary restrictions don’t require flavor sacrifices. With its tender, moist crumb and perfectly balanced vanilla flavor, it’s become the go-to celebration cake for countless families both those who need gluten-free options and those who simply love exceptional cake.
Whether you’re new to gluten-free baking or a seasoned pro, this recipe’s detailed instructions and professional tips ensure success every time. The beauty lies in its versatility use it as a base for countless flavor variations or enjoy it simply with your favorite frosting.
I’d love to see your beautiful cake creations! Share your photos on Instagram using #ClassicGFVanillaCake and tag me @YaniRecipes. Don’t forget to leave a review below and let me know what frosting combinations you tried your feedback helps me create even better recipes for our growing gluten-free community.
Ready for more gluten-free dessert magic? Subscribe to my newsletter for weekly recipes, baking tips, and exclusive troubleshooting guides that’ll make you the hero of every celebration.
Try These Related Recipes:
- How to Make 5-Minute Flourless Chocolate Mug Cake
- Lemon Pound Cake: How to Get That Perfect Glaze
- Gluten Free Carrot Cake: The Best Recipe Ever Made
- Red Velvet Bundt Cake: The Best Recipe Ever
- Gluten Free Chocolate Cake: The Best Recipe Ever
Tried This Recipe? Tell Us How It Went!
There are no reviews yet. Be the first one to write one.