Key Lime Pie: How to Make It Perfectly Creamy
Ingredients
Instructions
STEP 1: PREPARE THE GLUTEN-FREE GRAHAM CRACKER CRUST
- Preheat your oven to 350°F (175°C). In a medium bowl, combine graham cracker crumbs, sugar, salt, and cinnamon (if using). Pour melted butter over crumbs and stir with a fork until mixture resembles wet sand all crumbs should be evenly coated with no dry patches visible. The texture should hold together when pressed. Transfer to a 9-inch pie dish and press firmly into bottom and up sides using the bottom of a measuring cup or flat glass. Create an even thickness throughout, paying special attention to the corner where bottom meets sides to prevent cracking. Bake for 10 minutes until fragrant and lightly golden. Cool on wire rack while preparing filling (minimum 15 minutes).Visual cue: Properly pressed crust appears compact with no loose crumbs and holds its shape without slumping.
STEP 2: MIX THE KEY LIME PIE FILLING
- In a medium bowl, whisk egg yolks vigorously for 30 seconds until smooth and slightly lighter in color. Add sweetened condensed milk and whisk for 1 minute until completely combined mixture should be thick and uniform with no streaks. Add fresh lime juice, lime zest, and salt. Whisk gently for 30-45 seconds until just combined. The mixture will thicken noticeably as the acid in the lime juice reacts with the milk proteins this is the key lime pie chemistry at work. Don't overmix after adding lime juice, as this can create air bubbles.Texture checkpoint: Filling should be thick enough to coat the back of a spoon and fall in ribbons, not streams. Color will be pale yellow-green from natural limes.
STEP 3: BAKE YOUR KEY LIME PIE TO CREAMY PERFECTION
- Pour filling into the warm (not hot) pre-baked crust, using a spatula to spread evenly to edges. Gently tap pie dish on counter 2-3 times to release any air bubbles. Bake at 350°F (175°C) for 15-17 minutes. The filling is done when edges are set but the center still jiggles slightly when gently shaken—about a 2-inch diameter circle in the center should wobble like soft-set gelatin. The surface should appear matte, not shiny or wet. Overbaking creates rubbery texture, so err on the side of slight underdone carryover heat continues cooking.Critical timing: Remove from oven when you see just the slightest jiggle in center. It will firm completely during chilling. If center is completely set, pie is overbaked.
STEP 4: COOL AND CHILL FOR OPTIMAL TEXTURE
- Remove pie from oven and place on wire rack. Let cool at room temperature for 30 minutes—this gradual cooling prevents cracking. Once cooled to room temperature, cover loosely with plastic wrap (don't let it touch filling surface) or aluminum foil. Refrigerate for minimum 3 hours, preferably overnight. The filling firms substantially during chilling and flavors meld beautifully. Full texture development requires at least 3 hours don't rush this step.Make-ahead advantage: Key lime pie actually improves after 12-24 hours as the tart lime flavor mellows slightly and texture becomes even creamier.
STEP 5: PREPARE WHIPPED CREAM TOPPING
- Just before serving, beat cold heavy cream in a chilled bowl with an electric mixer on medium speed until soft peaks form (2-3 minutes). Add powdered sugar and vanilla extract. Continue beating on medium-high speed until stiff peaks form (1-2 additional minutes) cream should hold its shape firmly when whisk is lifted but still look smooth and glossy, not grainy or separated.Timing tip: Make whipped cream fresh within 2 hours of serving for best texture. Stabilized version (see Expert Tips) holds up to 24 hours.
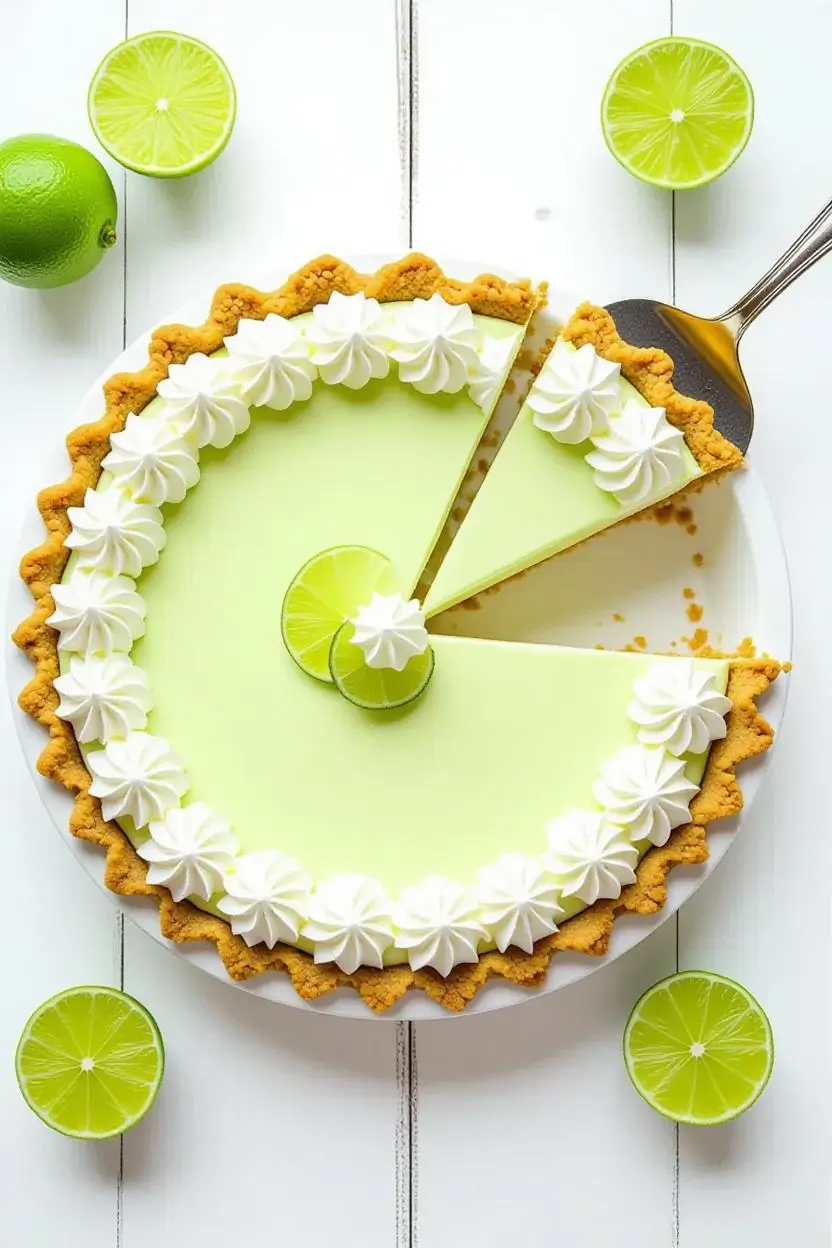
STEP 6: TOP AND SERVE YOUR KEY LIME PIE
- Remove pie from refrigerator 5-10 minutes before serving to take slight chill off (optimal serving temperature is cold but not icy). Spread whipped cream over filling with offset spatula, creating soft peaks and swirls, or pipe decorative rosettes using a piping bag with star tip. Alternatively, serve whipped cream on the side and let guests add their own. Garnish with thin lime slices, lime zest curls, or fresh mint leaves for visual appeal. For clean slices, wipe knife with hot water and dry between cuts.Presentation note: Classic key lime pie showcases the pale filling with simple white cream and green lime garnish let the natural colors shine.