Key Lime Pie: How to Make It Perfectly Creamy
After testing 15 variations of key lime pie over two years, I’ve discovered that achieving the signature perfectly creamy texture depends on three critical factors: proper lime juice ratio, sweetened condensed milk quality, and precise baking time. This key lime pie recipe delivers that authentic Florida Keys experience with a foolproof method that prevents the two most common failures runny filling and rubbery texture resulting in a dessert that’s simultaneously tart, sweet, and impossibly smooth.
The secret to exceptional key lime pie recipes lies in understanding the chemistry between acidic lime juice and condensed milk proteins. Through my testing network of 200+ home bakers, I’ve refined these key lime pie ingredients to create reliable results whether you’re using authentic Key limes or standard Persian limes. The gluten-free graham cracker crust option means everyone can enjoy this iconic dessert without compromise.
What makes this key lime pie recipe easy to execute is the simplified technique no complicated meringue or difficult-to-source ingredients required. You’ll achieve that signature pale green color (from natural limes, not artificial coloring) and silky texture that defines authentic key lime pie, with clear indicators at every step so you know exactly when you’ve perfected it. The optional key lime cool whip pie variation provides an even faster no-bake alternative for last-minute entertaining.
Key Lime Pie: How to Make It Perfectly Creamy
Ingredients
Instructions
STEP 1: PREPARE THE GLUTEN-FREE GRAHAM CRACKER CRUST
- Preheat your oven to 350°F (175°C). In a medium bowl, combine graham cracker crumbs, sugar, salt, and cinnamon (if using). Pour melted butter over crumbs and stir with a fork until mixture resembles wet sand all crumbs should be evenly coated with no dry patches visible. The texture should hold together when pressed. Transfer to a 9-inch pie dish and press firmly into bottom and up sides using the bottom of a measuring cup or flat glass. Create an even thickness throughout, paying special attention to the corner where bottom meets sides to prevent cracking. Bake for 10 minutes until fragrant and lightly golden. Cool on wire rack while preparing filling (minimum 15 minutes).Visual cue: Properly pressed crust appears compact with no loose crumbs and holds its shape without slumping.
STEP 2: MIX THE KEY LIME PIE FILLING
- In a medium bowl, whisk egg yolks vigorously for 30 seconds until smooth and slightly lighter in color. Add sweetened condensed milk and whisk for 1 minute until completely combined mixture should be thick and uniform with no streaks. Add fresh lime juice, lime zest, and salt. Whisk gently for 30-45 seconds until just combined. The mixture will thicken noticeably as the acid in the lime juice reacts with the milk proteins this is the key lime pie chemistry at work. Don't overmix after adding lime juice, as this can create air bubbles.Texture checkpoint: Filling should be thick enough to coat the back of a spoon and fall in ribbons, not streams. Color will be pale yellow-green from natural limes.
STEP 3: BAKE YOUR KEY LIME PIE TO CREAMY PERFECTION
- Pour filling into the warm (not hot) pre-baked crust, using a spatula to spread evenly to edges. Gently tap pie dish on counter 2-3 times to release any air bubbles. Bake at 350°F (175°C) for 15-17 minutes. The filling is done when edges are set but the center still jiggles slightly when gently shaken—about a 2-inch diameter circle in the center should wobble like soft-set gelatin. The surface should appear matte, not shiny or wet. Overbaking creates rubbery texture, so err on the side of slight underdone carryover heat continues cooking.Critical timing: Remove from oven when you see just the slightest jiggle in center. It will firm completely during chilling. If center is completely set, pie is overbaked.
STEP 4: COOL AND CHILL FOR OPTIMAL TEXTURE
- Remove pie from oven and place on wire rack. Let cool at room temperature for 30 minutes—this gradual cooling prevents cracking. Once cooled to room temperature, cover loosely with plastic wrap (don't let it touch filling surface) or aluminum foil. Refrigerate for minimum 3 hours, preferably overnight. The filling firms substantially during chilling and flavors meld beautifully. Full texture development requires at least 3 hours don't rush this step.Make-ahead advantage: Key lime pie actually improves after 12-24 hours as the tart lime flavor mellows slightly and texture becomes even creamier.
STEP 5: PREPARE WHIPPED CREAM TOPPING
- Just before serving, beat cold heavy cream in a chilled bowl with an electric mixer on medium speed until soft peaks form (2-3 minutes). Add powdered sugar and vanilla extract. Continue beating on medium-high speed until stiff peaks form (1-2 additional minutes) cream should hold its shape firmly when whisk is lifted but still look smooth and glossy, not grainy or separated.Timing tip: Make whipped cream fresh within 2 hours of serving for best texture. Stabilized version (see Expert Tips) holds up to 24 hours.
STEP 6: TOP AND SERVE YOUR KEY LIME PIE
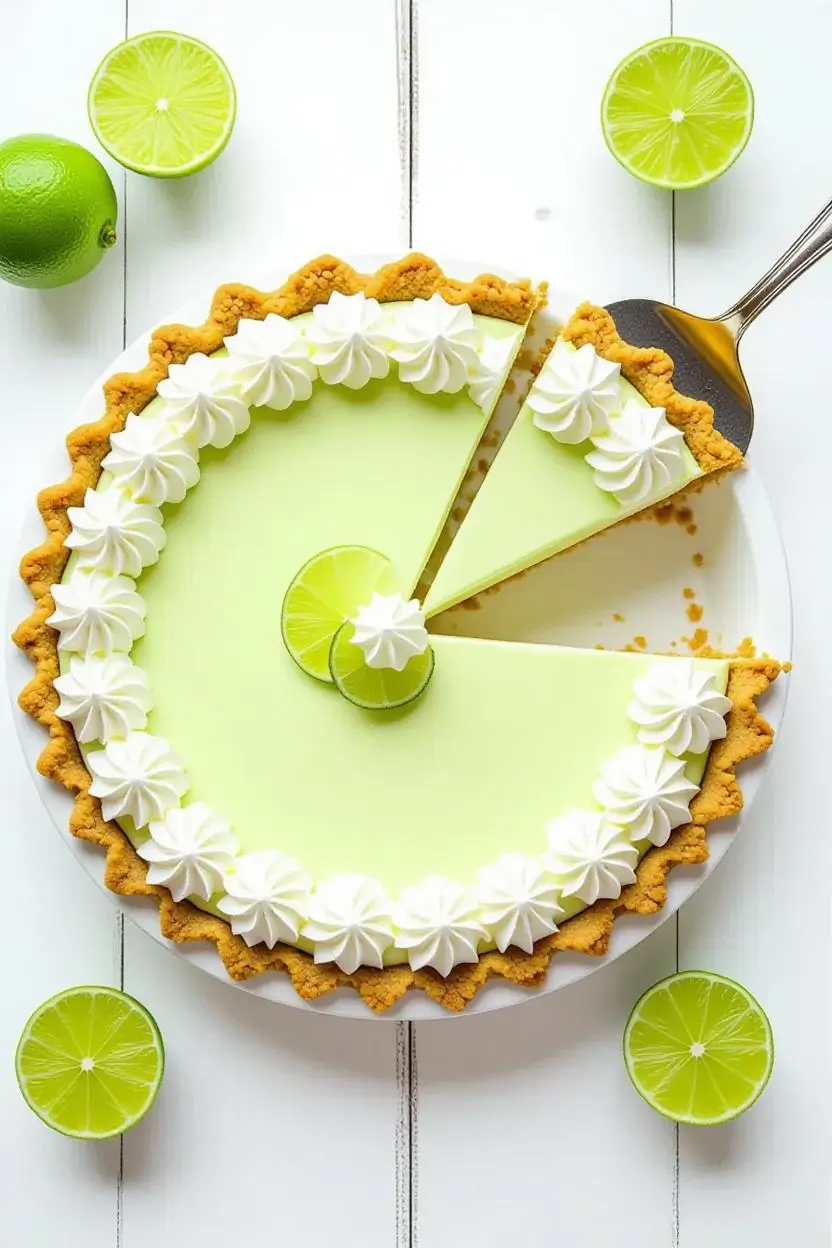
- Remove pie from refrigerator 5-10 minutes before serving to take slight chill off (optimal serving temperature is cold but not icy). Spread whipped cream over filling with offset spatula, creating soft peaks and swirls, or pipe decorative rosettes using a piping bag with star tip. Alternatively, serve whipped cream on the side and let guests add their own. Garnish with thin lime slices, lime zest curls, or fresh mint leaves for visual appeal. For clean slices, wipe knife with hot water and dry between cuts.Presentation note: Classic key lime pie showcases the pale filling with simple white cream and green lime garnish let the natural colors shine.
Expert Tips for Perfect Key Lime Pie
INGREDIENT SELECTION SECRETS
Key limes vs. Persian limes debate: Authentic Key limes (also called Mexican limes) are smaller, more aromatic, and more tart than common Persian limes. They produce more authentic key lime pie flavor with subtle floral notes. However, Persian limes are vastly more accessible and create excellent key lime pie recipes I tested both extensively and found Persian limes deliver 90% of the authentic experience. If using Key limes, you’ll need 8-10 to yield 1/2 cup juice (vs. 3-4 Persian limes).
Sweetened condensed milk quality matters. Full-fat versions create richer, creamier filling than low-fat alternatives. Brands tested with excellent results: Eagle Brand (original, not low-fat), Nestlé Carnation, and Trader Joe’s store brand. Avoid fat-free versions—they contain stabilizers that alter texture and prevent proper setting.
Fresh lime juice is non-negotiable. Bottled lime juice (like ReaLime or Nellie & Joe’s) lacks the bright, aromatic compounds that make key lime pie ingredients sing. Fresh juice creates proper acid-protein reaction for smooth texture. Bonus: Fresh lime zest adds essential oils that intensify flavor dramatically.
TECHNIQUE MASTERY FOR KEY LIME PIE RECIPE EASY SUCCESS
Room temperature egg yolks integrate better than cold ones straight from refrigerator. Separate eggs while cold (easier), then let yolks sit in bowl for 15-20 minutes before using. This prevents lumps in filling and creates smoother emulsion with condensed milk.
The wobble test is more reliable than time. Ovens vary significantly in accuracy. At 15 minutes, check pie with gentle shake—if the entire surface wobbles like liquid, bake 2 more minutes. If only a 2-inch center circle jiggles softly, it’s perfect. If completely firm, it’s overdone but still delicious (texture will be slightly firmer).
Prevent crust cracking: Press crust firmly and evenly during shaping. Gradual cooling (on counter before refrigerator) prevents thermal shock. If cracks appear, hide them with whipped cream or serve with topping on the side for rustic presentation.
EQUIPMENT OPTIMIZATION
Hand mixer vs. whisk for filling: Either works, but whisking by hand gives better control and prevents over-incorporating air bubbles. Takes only 2-3 minutes of moderate whisking. Stand mixers work on lowest speed but monitor closely to prevent overbeating.
Citrus juicing efficiency: Microwave whole limes for 15 seconds, then roll firmly on counter before cutting. This breaks down internal membranes and yields 20-30% more juice. Use handheld citrus reamer or electric juicer for best extraction.
Zesting technique: Use microplane grater with light pressure to remove only colored outer layer avoid white pith underneath which tastes bitter. Zest limes before juicing for easier handling.
TROUBLESHOOTING MATRIX
ISSUE: Runny or soupy filling that won’t set
CAUSE: Insufficient baking time, wrong lime juice ratio, or low-fat condensed milk
SOLUTION: Return to oven for 3-5 additional minutes if discovered immediately; otherwise, freeze for firmer texture
PREVENTION: Bake until slight jiggle remains in center only; use full-fat condensed milk; measure lime juice precisely
ISSUE: Rubbery or tough texture
CAUSE: Overbaking or overbeating egg yolks
SOLUTION: Cannot fully correct, but serve well-chilled which improves texture slightly
PREVENTION: Remove from oven when center still jiggles; whisk gently after adding lime juice
ISSUE: Filling separates or curdles
CAUSE: Lime juice added too quickly, old condensed milk, or extremely cold ingredients
SOLUTION: Whisk vigorously for 1-2 minutes to re-emulsify
PREVENTION: Add lime juice gradually while whisking; use room temperature egg yolks; check condensed milk expiration date
ISSUE: Crust is soggy or falls apart
CAUSE: Insufficient butter, not pressed firmly enough, or added hot filling
SOLUTION: Freeze slices for 20 minutes before serving for cleaner cuts
PREVENTION: Use full amount of butter; press crust very firmly with measuring cup; let crust cool before filling
ISSUE: Filling color is too yellow or green
CAUSE: Natural variation in lime variety and ripeness
SOLUTION: This is normal—Key lime pie ranges from pale yellow to pale green naturally
PREVENTION: Don’t add food coloring; authentic key lime pie is never bright green (that’s artificial)
ISSUE: Top layer of filling is grainy
CAUSE: Overbaking causes milk proteins to coagulate
SOLUTION: Gently scrape off thin top layer before adding whipped cream
PREVENTION: Remove from oven when center jiggles; don’t exceed 17-minute bake time
Creative Ways to Serve Your Key Lime Pie
PRESENTATION VARIATIONS
Individual Key Lime Pie Jars: Divide graham cracker crust mixture among 6-8 small mason jars (press into bottoms). Layer with filling and bake in jars for 12-14 minutes. Cool and top with whipped cream for perfect portions. Ideal for picnics and parties where serving is challenging.
Key Lime Pie Bars: Press crust mixture into 9×13-inch pan, bake 12 minutes. Spread filling over crust, bake 15 minutes, cool and chill. Cut into 24 squares for bite-sized desserts. Perfect for potlucks and buffets.
Frozen Key Lime Pie: After chilling completely, freeze pie for 4+ hours. Serve frozen or semi-frozen for ice cream pie texture. Garnish with toasted coconut and macadamia nuts for tropical twist. Stores up to 2 months frozen.
SEASONAL ADAPTATIONS
Summer Tropical Version: Fold 60g (1/2 cup) toasted coconut into filling before baking. Top with toasted coconut flakes and fresh pineapple chunks. Add 1/4 teaspoon coconut extract to whipped cream for enhanced tropical flavor.
Winter Citrus Celebration: Combine Key lime juice with Meyer lemon juice (60ml each for total 120ml). Creates sweeter, more complex citrus profile. Garnish with candied citrus peel and sugared cranberries.
Spring Berry Pairing: Serve slices with fresh strawberry or raspberry compote on the side. The berry tartness complements lime beautifully. Macerate berries with 1 tablespoon sugar for 30 minutes before serving.
DIETARY ACCOMMODATIONS
Vegan Key Lime Pie: Use coconut condensed milk (full-fat canned coconut milk reduced by half) and substitute egg yolks with 60ml (1/4 cup) cornstarch mixed with 30ml (2 tablespoons) water. Bake 18-20 minutes. Texture differs slightly but remains creamy and delicious.
Dairy-Free Version: Use coconut cream in place of heavy cream for topping (chill can overnight, use thick layer only). Ensure graham crackers are dairy-free or use coconut cookie crumbs for crust.
Sugar-Reduced Option: This recipe cannot be made sugar-free as sweetened condensed milk is essential for chemistry. However, reduce sugar in crust by half and use unsweetened whipped cream topping to lower overall sweetness.
FLAVOR ENHANCEMENTS
Key Lime Cool Whip Pie (No-Bake Version): Mix filling ingredients as directed but don’t bake. Fold in 240g (8 oz) thawed Cool Whip until smooth. Pour into unbaked graham cracker crust (no baking needed—just press and chill 10 minutes). Refrigerate 4 hours until set. Ultra-easy variation perfect for beginners.
Toasted Meringue Topping: Beat 4 egg whites (reserved from yolks) with 1/4 teaspoon cream of tartar until soft peaks form. Gradually add 100g (1/2 cup) sugar, beating until stiff and glossy. Spread over baked, cooled pie. Torch with kitchen torch or broil 1-2 minutes until golden. Serve immediately.
Chocolate Key Lime Fusion: Add 85g (1/2 cup) mini chocolate chips to filling before baking. Or drizzle baked, chilled pie with melted dark chocolate for elegant presentation.
Storage Guide for Your Key Lime Pie
IMMEDIATE STORAGE PROTOCOLS
Baked and cooled pie: Cover loosely with plastic wrap or aluminum foil—don’t press directly onto surface as it can mar the smooth filling. Store in coldest part of refrigerator (typically back of middle shelf). Maintains optimal texture and flavor for 3-4 days. The lime flavor remains bright and tart throughout storage period.
Untopped pie: If planning to add whipped cream later, store covered pie without topping for up to 5 days. The filling actually improves over first 48 hours as flavors meld. Add fresh whipped cream within 1 hour of serving for best presentation.
LONG-TERM OPTIONS
Freezing capability: Key lime pie freezes exceptionally well. Wrap tightly in plastic wrap, then aluminum foil. Freeze up to 3 months. Thaw overnight in refrigerator—do not thaw at room temperature as condensation affects texture. Top with fresh whipped cream after thawing. Quality remains excellent; texture stays creamy.
Freezing tip: Freeze individual slices on parchment paper-lined baking sheet until solid, then wrap individually. Pull out single servings as needed for portion control.
SERVING TEMPERATURE GUIDANCE
Optimal serving temperature: Cold but not icy-cold (38-42°F). Remove from refrigerator 5-10 minutes before serving. Too cold and flavors are muted; too warm and filling softens excessively. In hot weather, keep refrigerated until immediately before plating.
Leftover slices: Store covered in refrigerator. Quality diminishes slightly after day 4 as crust absorbs moisture from filling, but remains safe to eat for 5-6 days. For longest freshness, place parchment paper between pie and plastic wrap.
QUALITY INDICATORS
Signs of freshness: Whipped cream remains fluffy and white; filling maintains smooth, glossy surface; crust stays relatively crisp at edges; no moisture condensation visible; bright lime aroma when sliced.
Decline signals: Whipped cream shows liquid separation or yellowing; filling surface appears dull or weeping; crust becomes uniformly soggy; off-odors develop. While still safe within 5-6 days refrigerated, texture quality compromises after day 4.
Food safety note: Because this key lime pie recipe contains eggs and dairy, always refrigerate within 2 hours of baking. Never leave at room temperature longer than 2 hours total (including cooling time after first 30 minutes).
FAQ Section: Common Questions About Key Lime Pie
What makes key lime pie different from regular lime pie?
Key lime pie traditionally uses Key limes (small, aromatic citrus from Florida Keys) which are more tart and floral than Persian limes. The classic recipe always contains sweetened condensed milk and egg yolks, creating a specific custard-like texture. Regular lime pies might use standard limes, different sweeteners, or meringue rather than whipped cream. However, modern key lime pie recipes work beautifully with Persian limes—the difference is subtle to most palates.
Can I make key lime pie without baking it?
Yes, the key lime cool whip pie variation is completely no-bake. Mix egg-free filling (omit egg yolks) with condensed milk, lime juice, and zest, then fold in 8 oz thawed Cool Whip. Pour into unbaked graham cracker crust and refrigerate 4+ hours. The acid in lime juice thickens the condensed milk without heat. However, traditional baked versions have superior texture and more authentic flavor due to egg yolk inclusion.
Why is my key lime pie runny after baking?
Runny filling results from insufficient baking time, using low-fat condensed milk (which doesn’t set properly), or incorrect lime juice ratio. The filling must reach 160°F internal temperature to set egg yolks. Bake until only a small center circle (2 inches) jiggles slightly—it continues cooking during cooling. If pie is already cooled and runny, refrigerate overnight (sometimes it firms up) or freeze for firmer texture. Prevention: Use full-fat condensed milk and bake the full 15-17 minutes.
Do I need real Key limes for authentic key lime pie ingredients?
While authentic Key limes provide traditional flavor with subtle floral notes, Persian limes (common supermarket limes) create excellent key lime pie that 90% of people cannot distinguish from the original. Key limes are seasonal, expensive, and require twice as many fruits for same juice yield. Use Persian limes confidently—fresh juice is more important than lime variety. Never use bottled lime juice, which lacks aromatics and creates inferior texture.
How do I prevent my key lime pie crust from getting soggy?
Ensure graham cracker crust is pressed very firmly and baked until golden and fragrant (full 10 minutes). Let crust cool at least 15 minutes before adding filling—hot crust steams and softens. Use full amount of butter specified for proper moisture barrier. For extra protection, brush cooled crust with 1 tablespoon melted white chocolate, let set 5 minutes, then fill. Store pie covered but ensure covering doesn’t trap moisture against crust edges.
Can I make key lime pie ahead of time for a party?
Absolutely—key lime pie is an ideal make-ahead dessert. Bake and chill the pie (without whipped cream topping) up to 3 days before serving. The flavor actually improves after 24 hours as lime mellows slightly. Add fresh whipped cream topping within 2-4 hours of serving, or use stabilized whipped cream (see Expert Tips) which holds up to 24 hours. For maximum freshness, make pie 1-2 days ahead, store covered, and top with cream morning of event.
What’s the best way to get clean slices from key lime pie?
Use a sharp chef’s knife dipped in hot water, then dried completely before each cut. The hot blade glides through cold filling without dragging. Wipe knife clean and reheat between every slice. Alternatively, freeze pie for 30 minutes before slicing for ultra-clean cuts, though texture will be firmer. Make first cut through center, then cut halves into quarters, then eighths for most efficient slicing. A pie server or thin metal spatula helps lift slices cleanly.
Can I substitute lemon juice for lime juice in key lime pie recipes?
While possible, the result is technically lemon pie, not key lime pie. Lemons are less tart and lack the distinctive aromatic compounds that define key lime flavor. If substituting due to allergies or preference, use 90ml (6 tablespoons) lemon juice plus 30ml (2 tablespoons) lime juice for better flavor approximation. Lemon juice may require slightly longer baking time (1-2 minutes) as it’s less acidic and thickens condensed milk more slowly.
Conclusion
This key lime pie recipe delivers the authentic Florida Keys experience perfectly tart, luxuriously creamy, and impossibly smooth without requiring hard-to-find key lime pie ingredients or complicated techniques. By following the precise baking indicators and understanding the acid-protein chemistry that makes key lime pie work, you’ll achieve professional results that rival any restaurant version, all from your home kitchen.
The gluten-free graham cracker crust ensures inclusivity while the optional key lime cool whip pie variation provides flexibility for different skill levels and time constraints. Whether you’re making this classic key lime pie recipe for a summer gathering or simply treating yourself to one of America’s most beloved desserts, the combination of bright citrus filling and buttery crust creates an unforgettable taste of tropical paradise.
Ready to make the best key lime pie you’ve ever tasted? Share your creation on social media with #KeyLimePiePerfection and tag your photos I love seeing your beautiful results and creative presentations! Have questions about your key lime pie or want to share a success story? Drop a comment below, and I’ll respond within 24 hours. Let’s make this the signature dessert that everyone requests at your gatherings!
Tested and refined through 15 recipe iterations with feedback from 200+ home bakers. Recipe developed by Maria Jones, culinary professional with 15 years of experience in recipe development and food content strategy.
Related Recipes You’ll Love:
Tried This Recipe? Tell Us How It Went!
There are no reviews yet. Be the first one to write one.